Would you like to create a Yes/No form inside your WordPress blog using the OptinMonster WordPress plugin?
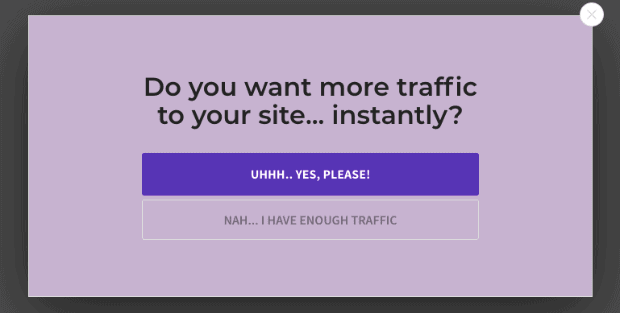
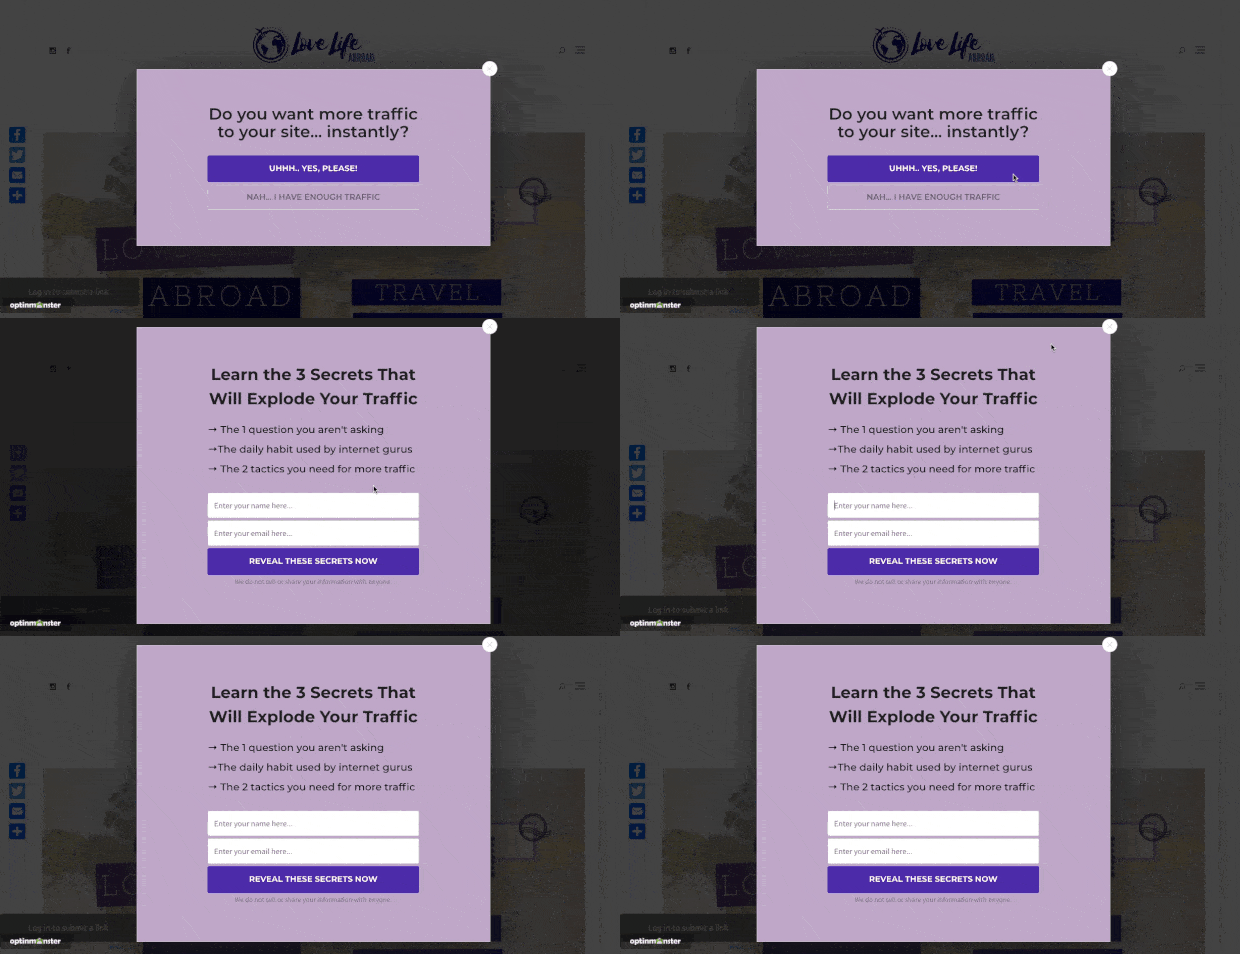
Creating a multi-step form will probably increase the conversion rates. The idea is pretty simple. We will ask the visitor a question and will give two options – Yes/No. We need to get them to click on the Yes option. Then, the form will show the name, email fields.
This is a great way for reducing cart abandonment.
OptinMonster
If you are looking for a lead generation plugin for your WordPress blog, you will find so many free and premium ones in the market. Well, for our users, we will always recommend the best ones. If you can afford a premium solution, go for OptinMonster.
OptinMonster is a premium lead generation software used by professional bloggers, business owners, and also big brands such as American Express, Click Bank, MacFree, etc. Sadly, there’s is no free version plugin available like WPForms, MonsterInsights.
OptinMonster comes with so many premium features like:
- MonsterLinks.
- Geo-Targeting.
- Exit-Intent.
- Yes/No Forms.
- Floating Bar.
- Countdown Timer.
- Content Locker.
- Coupon Wheel Optins.
- Inline Forms.
Etc.
This is the #1 WordPress lead generation plugin in the market.
OptinMonster Pricing
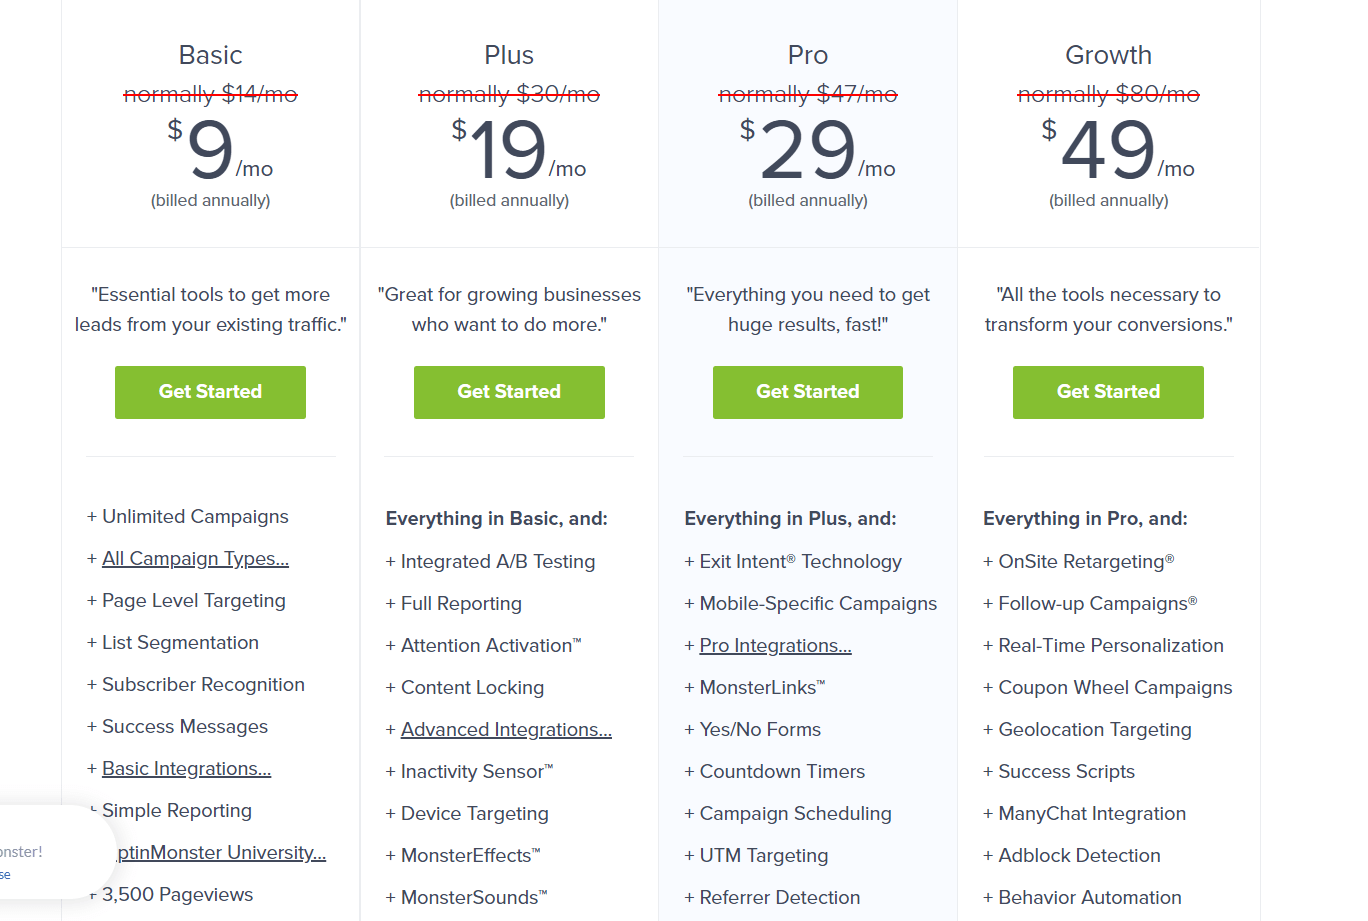
As of today, there are four premium plans available.
- Basic – $9/ month.
- Plus – $19/ month.
- Pro – $29/ month.
- Growth – $49/ month.
You will need to purchase the Pro or Growth plan for using the Yes/No forms feature.
How To Create a Yes/No Form
Now, let’s create the Yes/No form inside our WordPress blog.
The first thing you need to do is, purchase the OptinMonster premium plugin. You can use your Credit Card or PayPal account for processing the payment. Once you have purchased the plugin, log in to your OptinMonster account for accessing the API key, and creating forms.
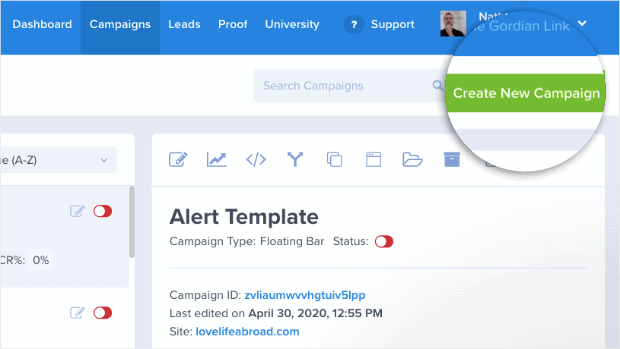
After logging in to the account, create a new campaign from there.
On the next screen, you will see several campaign types like:
- Popup.
- Floating Bar.
- Fullscreen.
- Inline.
- Slide-In.
Etc.
For this tutorial, we will be using the Popup campaign type.
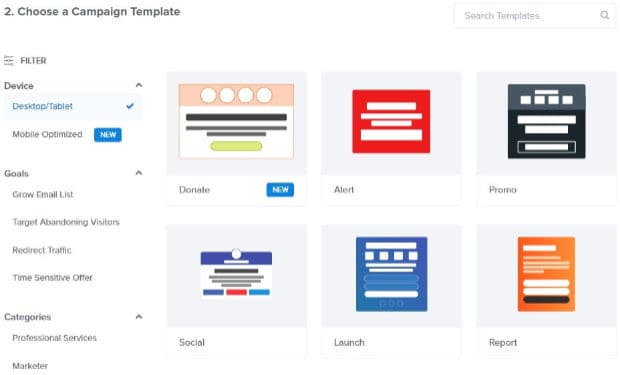
Now, select a template for your popup. You can see 50+ pre-made templates there. You can simply choose any of them, import to the editor.
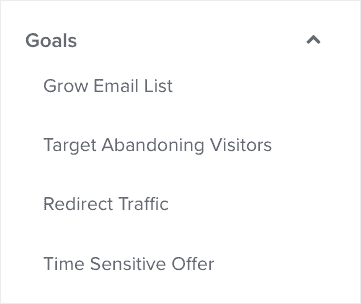
On the other hand, you can create a new one from scratch. Plus, the OptinMonster app also allows you to filter layouts based on your goals.
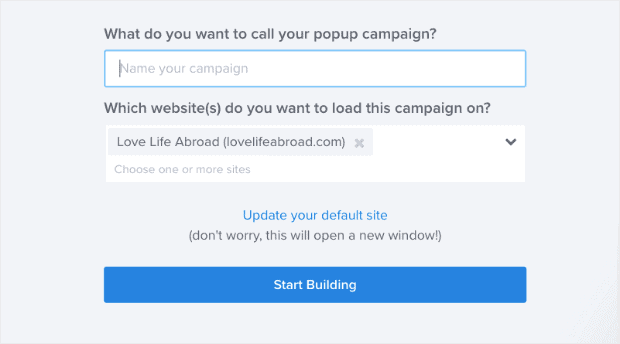
After that step, you will need to name your campaign. Plus, assign it to your WordPress site.
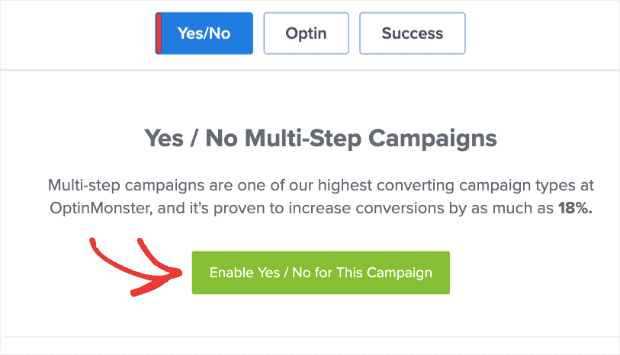
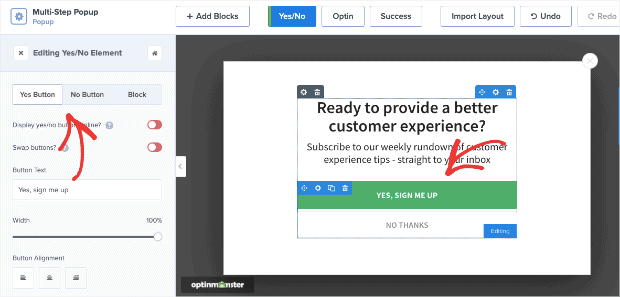
The name is just for identification. It won’t be visible in the frontend. You will be redirected to the form editor after naming it. At the top of the page, you will see an option named yes/no.
Enable the Yes/No option for your campaign.
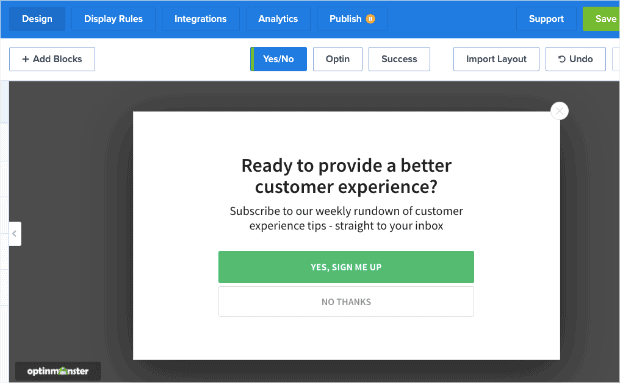
A new page will be added to the popup.
The fields in the form are 100% customizable. Clicking it will allow you to edit the content.
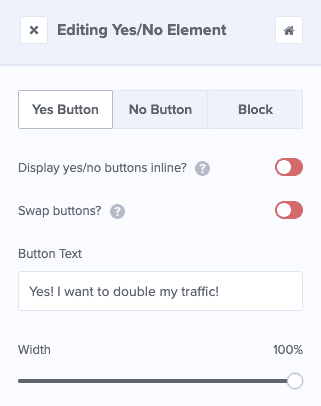
Add a question related to your industry. For example, if you are having an online shop that sells clothes, offer some discount or free shipping. The visitors will probably click on Yes and add their name to the email list! You can change the Yes button text, No button text, etc.
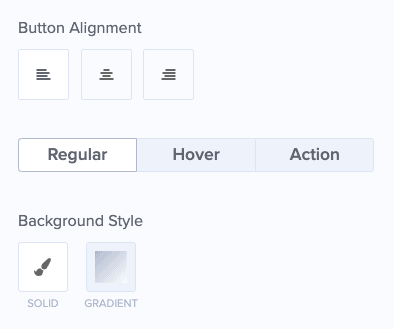
Once you scroll down, you will see three more settings.
- Regular.
- Hover.
- Action.
You can customize the normal button color, text, border, etc from the Regular settings. As the name suggests, Hover effects can be customized from Hover settings.
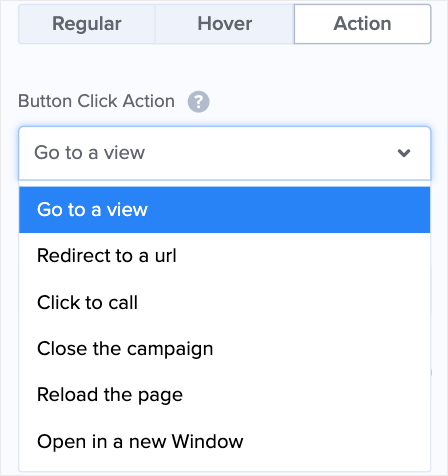
The button actions can be configured from the Action section.
According to your theme/ brand styles, you can customize the button and hover color. You need to configure the button actions carefully. These actions will be triggered when someone clicks on the Yes/No button.
Configuring it is pretty simple. After doing every modification, check the preview of the form.
And when a user clicks on the Yes button, the name and email fields will be displayed.
We have done everything with the design. Now, let’s go to the next step –Display Rules.
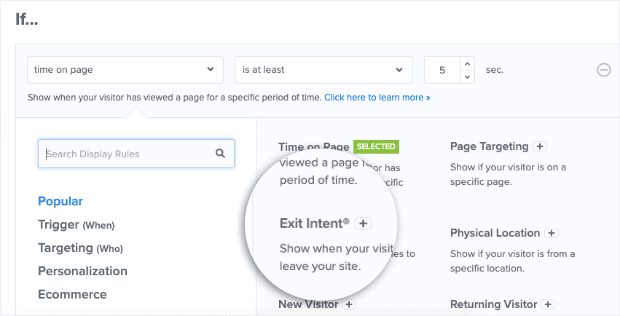
The plugin will automatically add two riles to your campaign. The first one will help you to show the optin after 5 seconds. The second rule will show the optin on all pages.
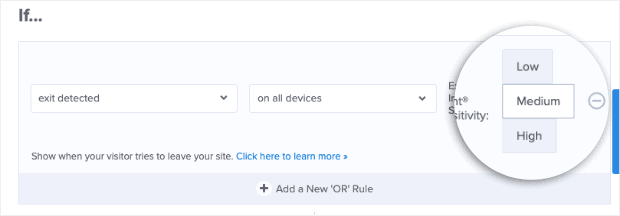
You can always add additional rules as you wanted. Popular features like exit-intent will be a great fit for your Yes/No form.
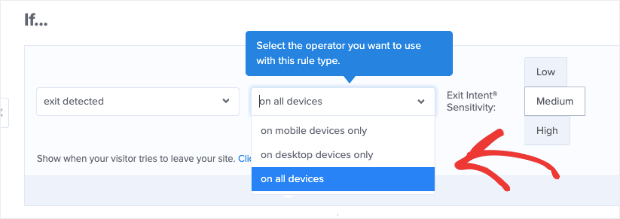
Choose the devices you are planning to target with the exit-intent feature.
OptinMonster now comes with mobile exit-intent popups too.
Select the sensitivity level you needed. Medium or High sensitivity is recommended.
You are done! Integrate the optin with your email marketing service. And after that, publish the campaign.
Log in to your WordPress blog and install, activate the OptinMonster plugin. Verify the plugin with your OptinMonster API key, complete the authentication.
You can make the campaign live from there!
So that’s it!
This is how you can create a Yes/No form using the OptinMonster WordPress plugin.
Get Started With OptinMonster
You can get the premium version of the OptinMonster WordPress plugin from below.
We hope you have found this article helpful and enjoyed the read. If you did, please consider sharing this article with your friends and fellow bloggers on social media. You can read more tutorials and product reviews on our blog.




Leave a Reply